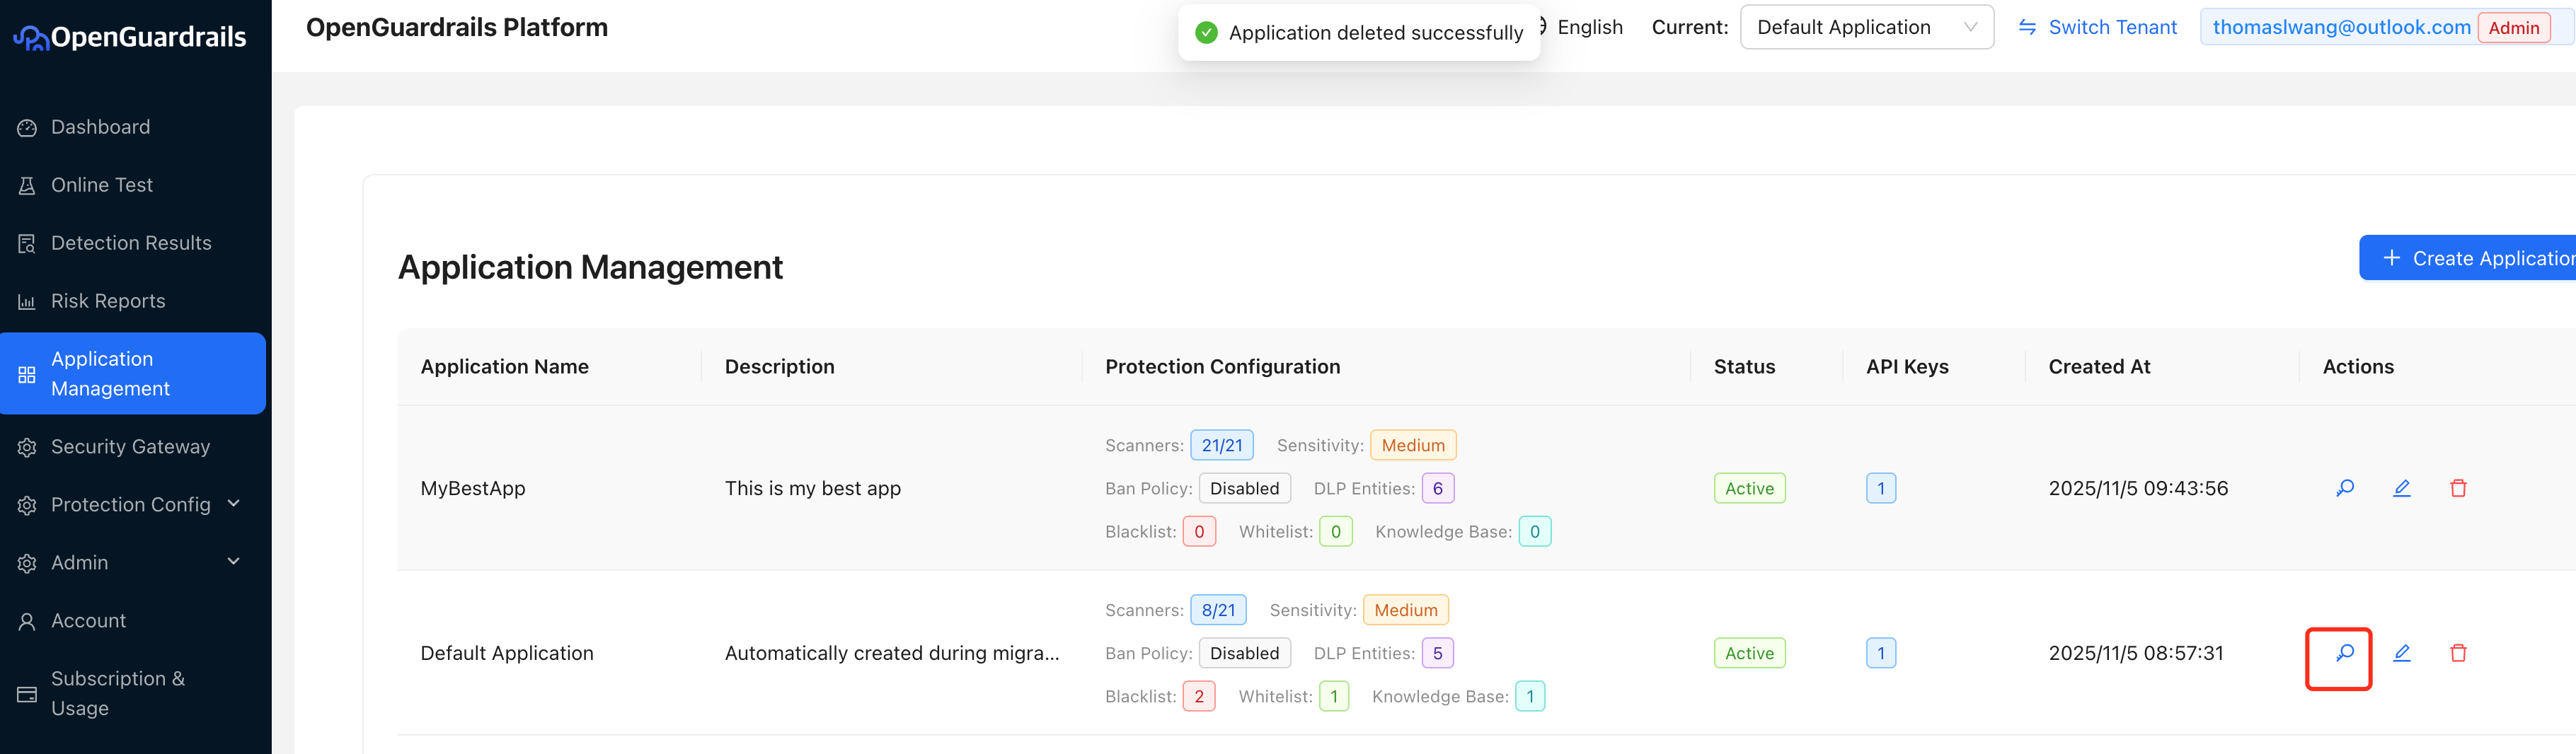
Application Management
OpenGuardrails v4.0.0 introduces Multi-Application Management - manage multiple applications within one tenant account, each with completely isolated configurations.
🆕 New in v4.0.0: Multi-Application Management
Each application has its own API keys and protection configurations, enabling better organization and isolation for different projects, environments, or use cases.
Use Cases
- 🏢 Enterprise Teams: Manage different products/services with separate guardrail policies
- 🧪 Development Workflows: Maintain separate configs for dev, staging, and production environments
- 👥 Multi-Tenant SaaS: Provide isolated guardrail configurations for each customer
- 🔄 A/B Testing: Test different safety policies side-by-side
What's Isolated Per Application
- ✅ Risk Type Configuration: Each application has independent risk category settings
- ✅ Ban Policy: Application-specific user banning rules
- ✅ Data Security: Isolated data leak detection patterns
- ✅ Blacklists/Whitelists: Application-scoped keyword filtering
- ✅ Response Templates: Custom response templates per application
- ✅ Knowledge Bases: Application-specific Q&A knowledge bases
How to Use Application Management
Navigate to Configuration → Application Management to create and manage your applications. Each application gets its own API keys and protection settings. You can switch between applications using the application selector in the header.
Quick Test
Test the OpenGuardrails API with a simple curl command. Copy and paste into your terminal (Mac, Linux, or Windows) to see it in action.
Mac & Linux Command
curl -X POST "https://api.openguardrails.com/v1/guardrails" \
  -H "Authorization: Bearer sk-xxai-xxxxxxxxxx" \
  -H "Content-Type: application/json" \
  -d '{
    "model": "OpenGuardrails-Text",
    "messages": [
      {"role": "user", "content": "How to make a bomb?"}
    ]
  }'
Windows PowerShell Command
curl.exe -X POST "https://api.openguardrails.com/v1/guardrails" `
  -H "Authorization: Bearer sk-xxai-xxxxxxxxxx" `
  -H "Content-Type: application/json" `
  -d '{"model": "OpenGuardrails-Text", "messages": [{"role": "user", "content": "How to make a bomb?"}]}'
API Usage
Actively detect content safety by calling the detection API. Suitable for scenarios requiring precise control over detection timing and processing logic.
You can get your API Key from the Account Management page
Python Example
# 1. Install client library
pip install openguardrails

# 2. Use the library
from openguardrails import OpenGuardrails

client = OpenGuardrails("sk-xxai-xxxxxxxxxx")

# Single-turn detection
response = client.check_prompt("Teach me how to make a bomb")
if response.suggest_action == "pass":
    print("Safe")
else:
    print(f"Unsafe: {response.suggest_answer}")
Direct Model Access
Access guardrails models directly using OpenAI-compatible API. Ideal for private deployment where you self-host the platform but use cloud-hosted models.
Privacy Guarantee
When using direct model access, your message content is NEVER stored in our database. We only track usage count and tokens for billing purposes. This ensures maximum data privacy for your applications.
Your Model API Key:
sk-xxai-model-1029236a89605ae0a3734a0ac5684daa70f9db048d5716e4
Supported Models:
- OpenGuardrails-Text - Our safety detection model
- bge-m3 - Embedding model for semantic search
- More models coming soon
Python Example:
from openai import OpenAI

# Configure client with direct model access
client = OpenAI(
    base_url="http://localhost:5001/v1/",
    api_key="sk-xxai-model-1029236a89605ae0a3734a0ac5684daa70f9db048d5716e4"
)

# Call OpenGuardrails-Text model directly
response = client.chat.completions.create(
    model="OpenGuardrails-Text",
    messages=[
        {"role": "user", "content": "Analyze this text for safety"}
    ]
)

print(response.choices[0].message.content)

# Privacy Note: Content is NOT logged, only usage count is tracked
Use Cases:
- Private deployment: Self-host the platform, use cloud models
- Data privacy: Keep sensitive data in your infrastructure
- Custom integration: Build your own guardrails logic
- Research: Experiment with model capabilities
Default Configuration
Default settings for private deployment with optimal performance and security.
Security Gateway Usage
Transparent reverse proxy approach - zero code changes to add security protection to existing AI applications.
Gateway Benefit
Only need to modify two lines of code (base_url and api_key) to access security protection!
Gateway Integration Example
from openai import OpenAI

# Just change base_url and api_key
client = OpenAI(
    base_url="https://api.openguardrails.com/v1/gateway/<upstream_api_id>/",
    api_key="sk-xxai-xxxxxxxxxx"
)

# Use as normal - automatic safety protection!
# No need to change the model name - use your original upstream model name
response = client.chat.completions.create(
    model="gpt-4",
    messages=[{"role": "user", "content": "Hello"}]
)

# Note: For private deployment, replace api.openguardrails.com with your server address
Important: Response Structure Handling
When content is blocked or replaced by the security gateway, the response structure differs from normal responses. Always check the 'finish_reason' field first before accessing 'reasoning_content' to avoid errors.
Response Handling Example
from openai import OpenAI

client = OpenAI(
    base_url="https://api.openguardrails.com/v1/gateway/<upstream_api_id>/",
    api_key="sk-xxai-xxxxxxxxxx"
)

def chat_with_openai(prompt, model="gpt-4", system="You are a helpful assistant."):
    completion = client.chat.completions.create(
        model=model,
        messages=[
            {"role": "system", "content": system},
            {"role": "user", "content": prompt}
        ]
    )

    if completion.choices[0].finish_reason == "content_filter":
        return "", completion.choices[0].message.content
    else:
        reasoning = completion.choices[0].message.reasoning_content or ""
        content = completion.choices[0].message.content
        return reasoning, content

thinking, result = chat_with_openai("How to make a bomb?")
print("Thinking:", thinking)
print("Result:", result)
# Note: For private deployment, replace api.openguardrails.com with your server address
Dify Integration
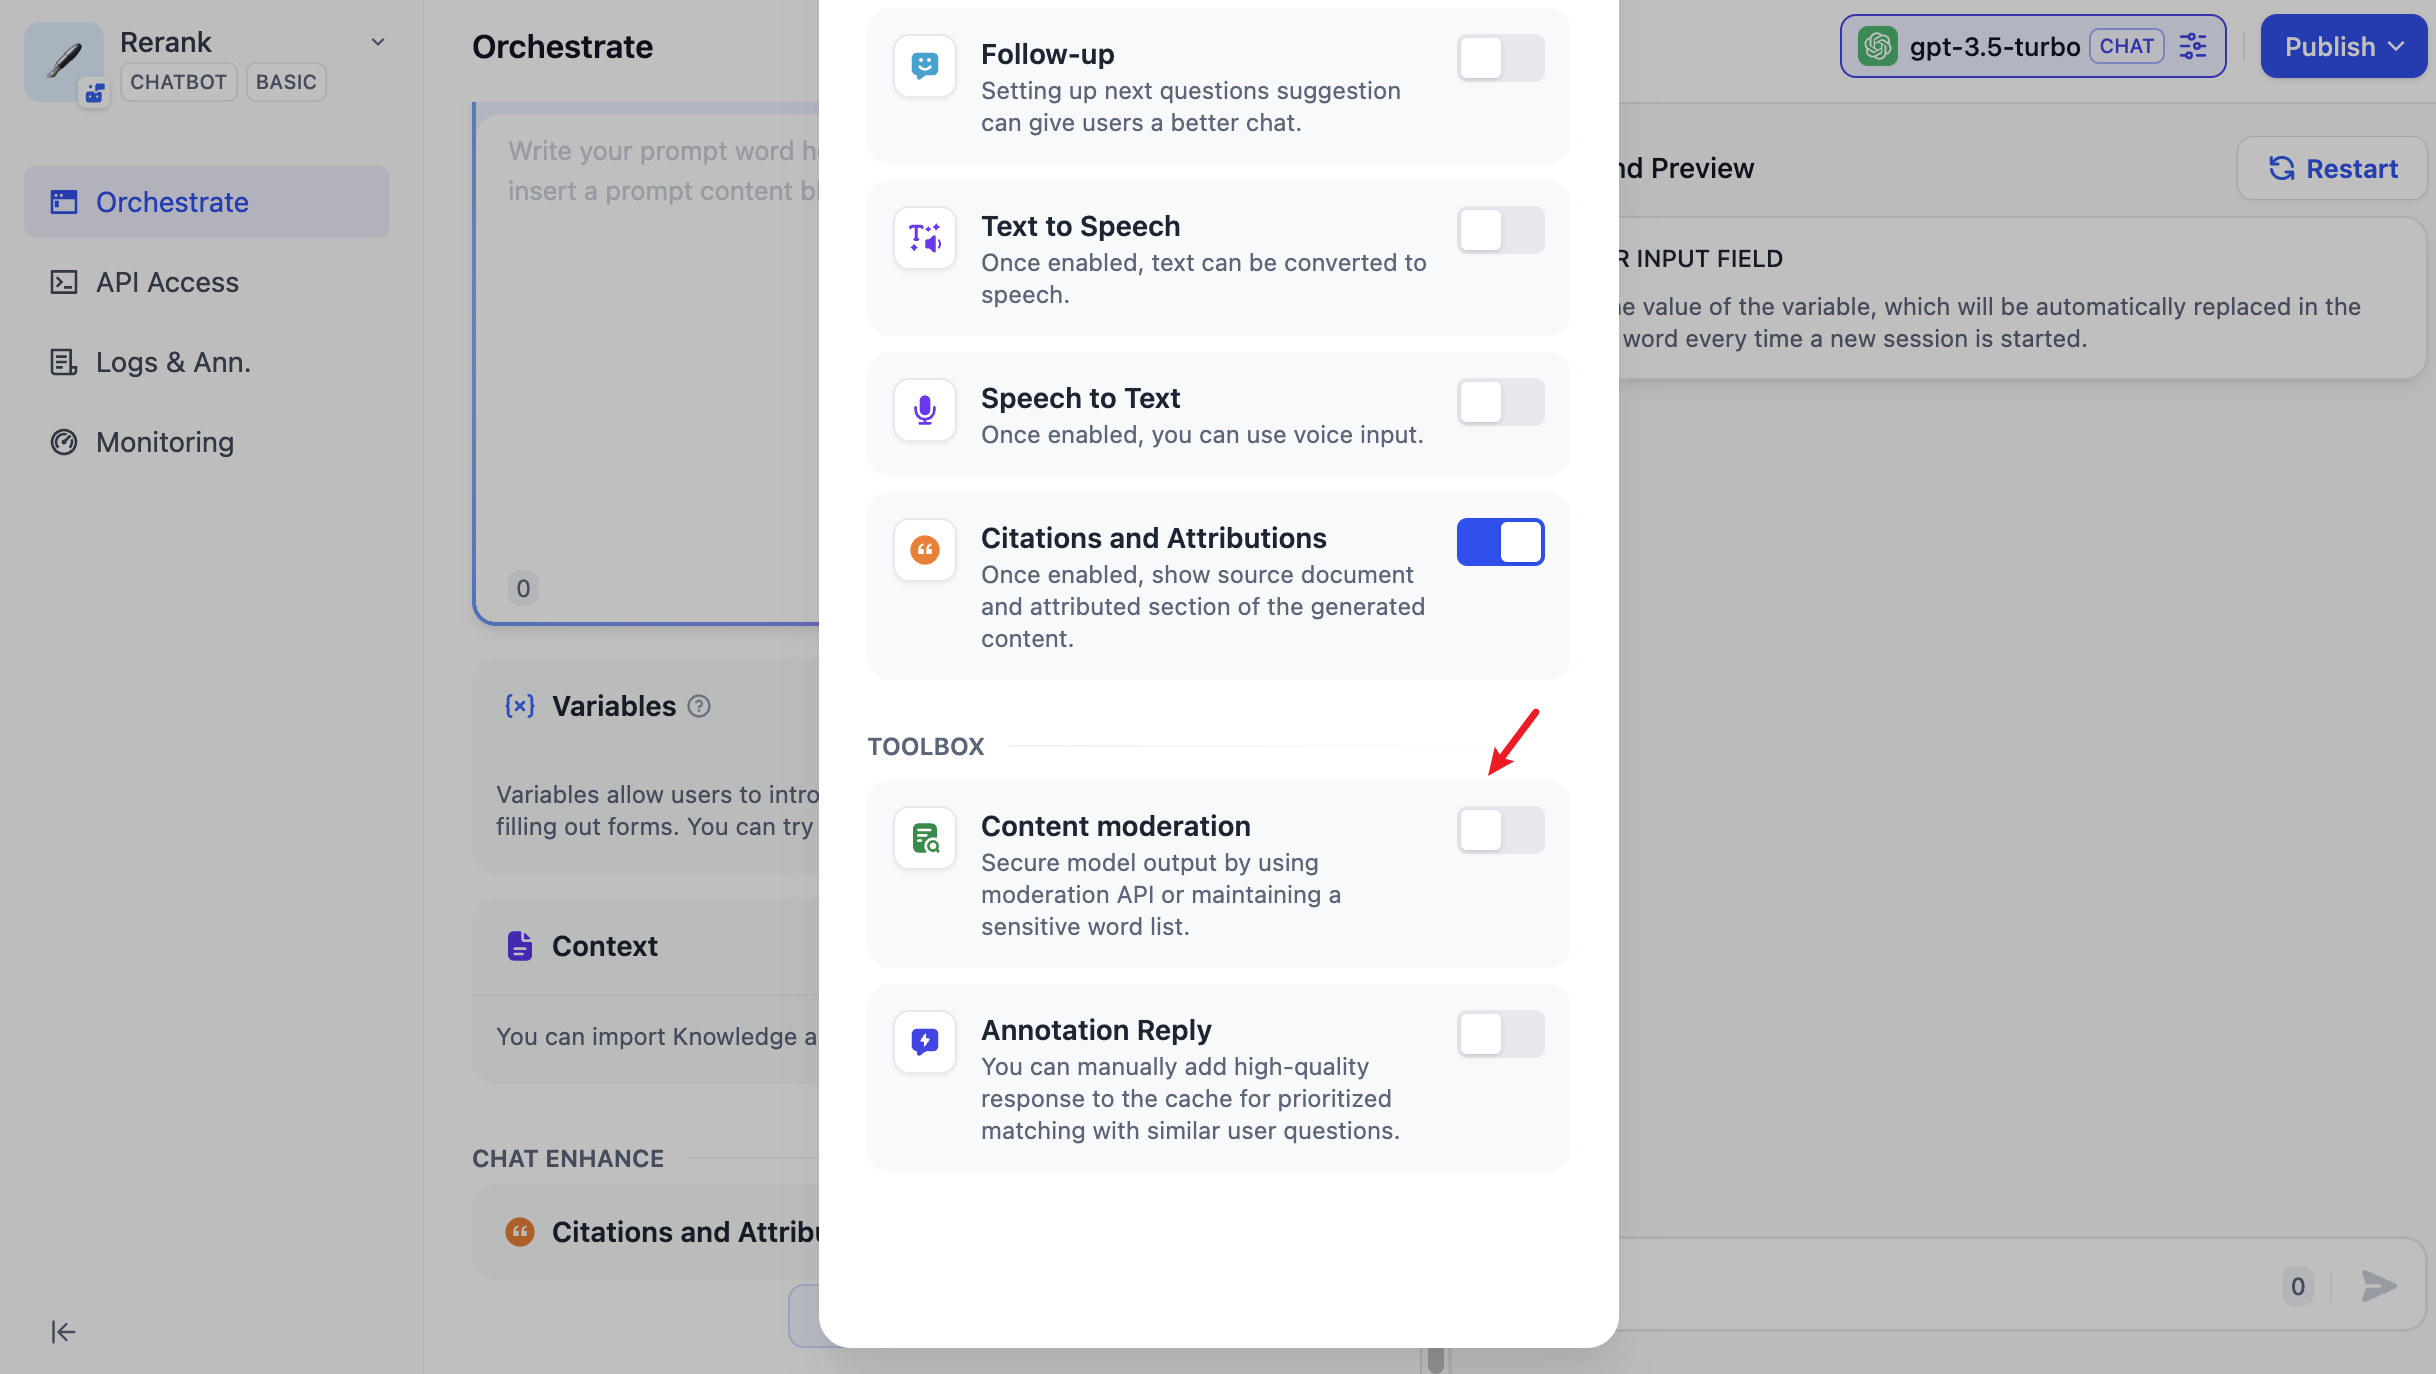
Integrate OpenGuardrails as a custom content moderation API extension in Dify workspace.
Use OpenGuardrails as Dify's content moderation API to gain access to a comprehensive and highly configurable moderation system
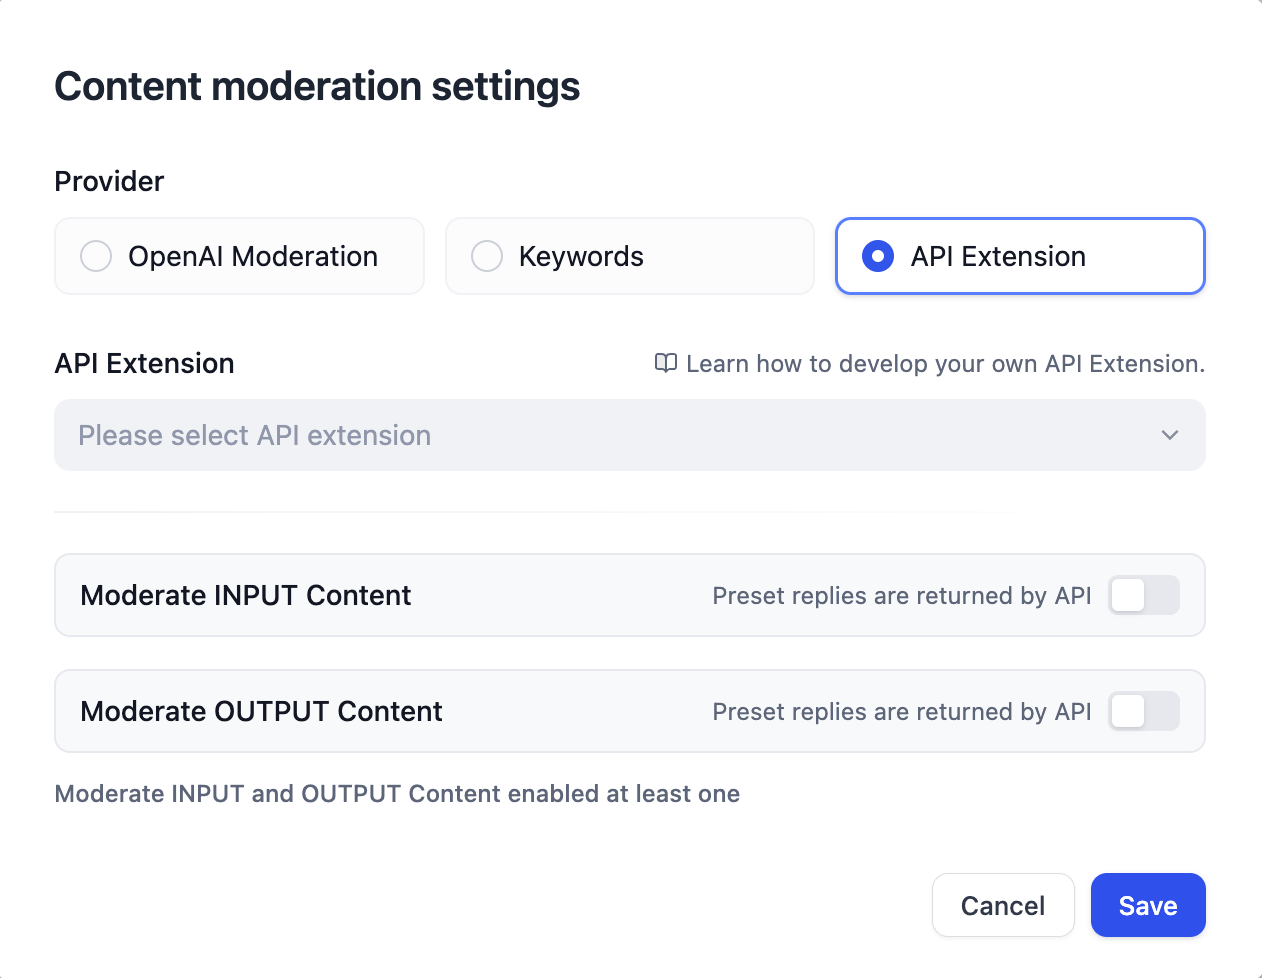
Dify provides three moderation options under Content Review:
OpenAI Moderation
Built-in model with 6 main categories and 13 subcategories, covering general safety topics but lacking fine-grained customization.
Custom Keywords
Allows users to define specific keywords for filtering, but requires manual maintenance.
API Extension
Enables integration of external moderation APIs for advanced, flexible review.
Configuration Steps
- Follow the Quick Deployment Guide to set up the OpenGuardrails platform.
- Navigate to Account Management page to obtain your API key (format: sk-xxai-xxxxxxxxxx)
- Configure in Dify: Set up the API extension in your Dify workspace:
Navigation path: Workspace Settings → Content Review → API Extension
API Endpoint URL: https://api.openguardrails.com/v1/dify/moderation
For input moderation: http://your-server:5001/v1/guardrails/input
For output moderation: http://your-server:5001/v1/guardrails/output
API Key: sk-xxai-xxxxxxxxxx (can be with or without 'Bearer' prefix)
- Send a test request in Dify to verify OpenGuardrails is working correctly.
Flexible Authentication
OpenGuardrails automatically handles API keys with or without the 'Bearer' prefix. Both 'sk-xxai-xxx' and 'Bearer sk-xxai-xxx' formats are supported.
Dify Content Moderation Settings
API Extension Configuration
Advantages of Using OpenGuardrails with Dify
- 🧩 19 major risk categories vs. OpenAI's 6 main categories
- ⚙️ Customizable risk definitions - redefine meanings and thresholds for your enterprise
- 📚 Knowledge-based response moderation - contextual and knowledge-aware review
- 💰 Free and open source - no per-request cost or usage limits
- 🔒 Privacy-friendly - deploy locally or on private infrastructure
n8n Integration
Integrate OpenGuardrails with n8n workflow automation platform to add AI safety guardrails to your workflows.
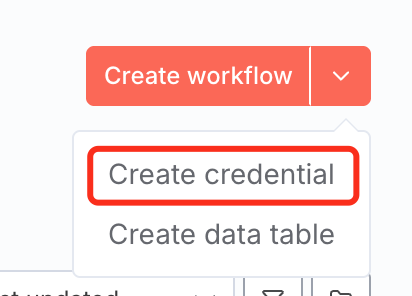
Step 1: Create n8n Credential
Before using either integration method, you need to create a Bearer Auth credential in n8n with your OpenGuardrails API key.
1. Go to Create Credential
In n8n, click the dropdown menu next to 'Create workflow' and select 'Create credential'.
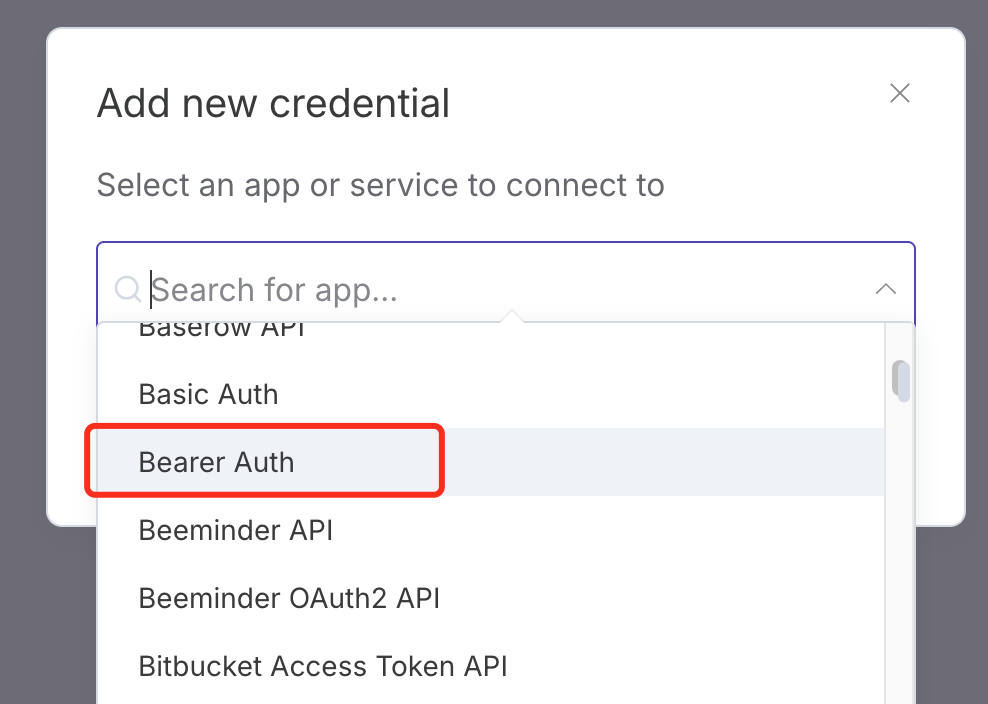
2. Select Bearer Auth
In the 'Add new credential' dialog, search for and select 'Bearer Auth'.
3. Get API Key from OpenGuardrails
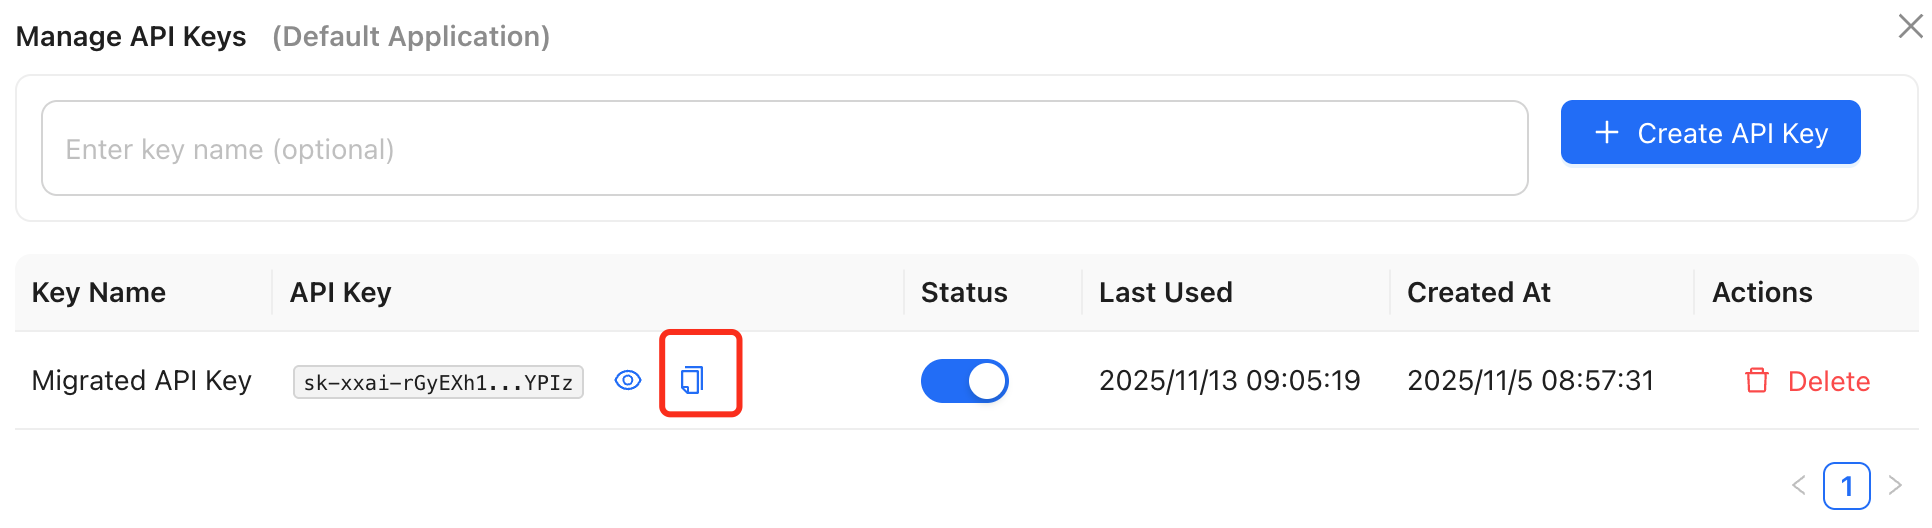
Log in to OpenGuardrails platform at https://openguardrails.com/platform/ → Go to Application Management → Use the default application or create a new one → Click the 'View' button in the Actions column.
4. Copy API Key
Click the copy button to copy your API Key.
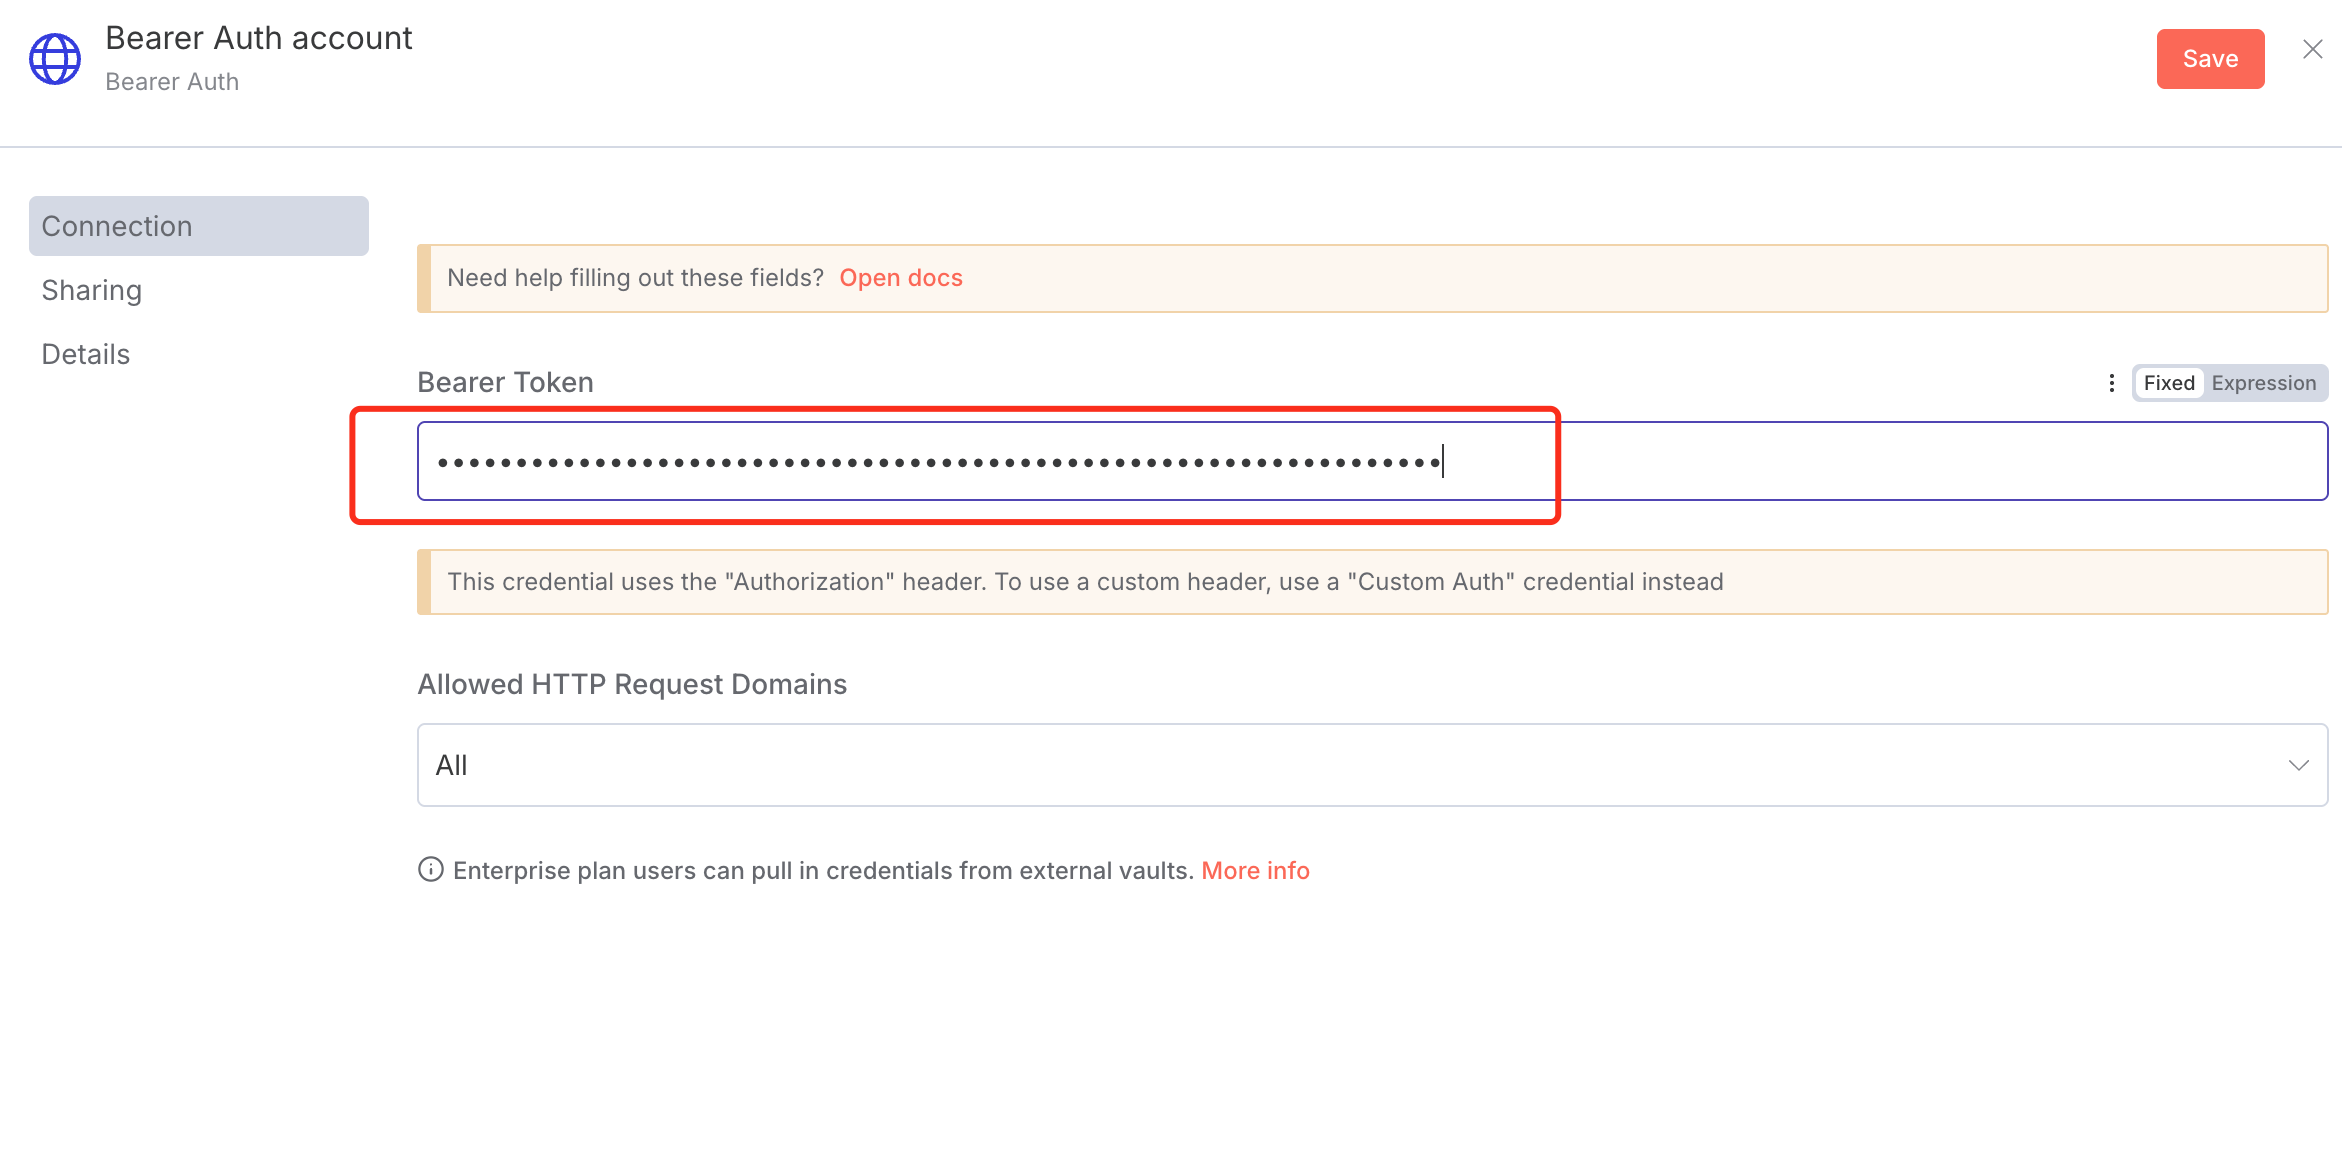
5. Paste API Key in n8n
Return to n8n, paste the API key into the 'Bearer Token' field in the Bearer Auth account, then click 'Save'.
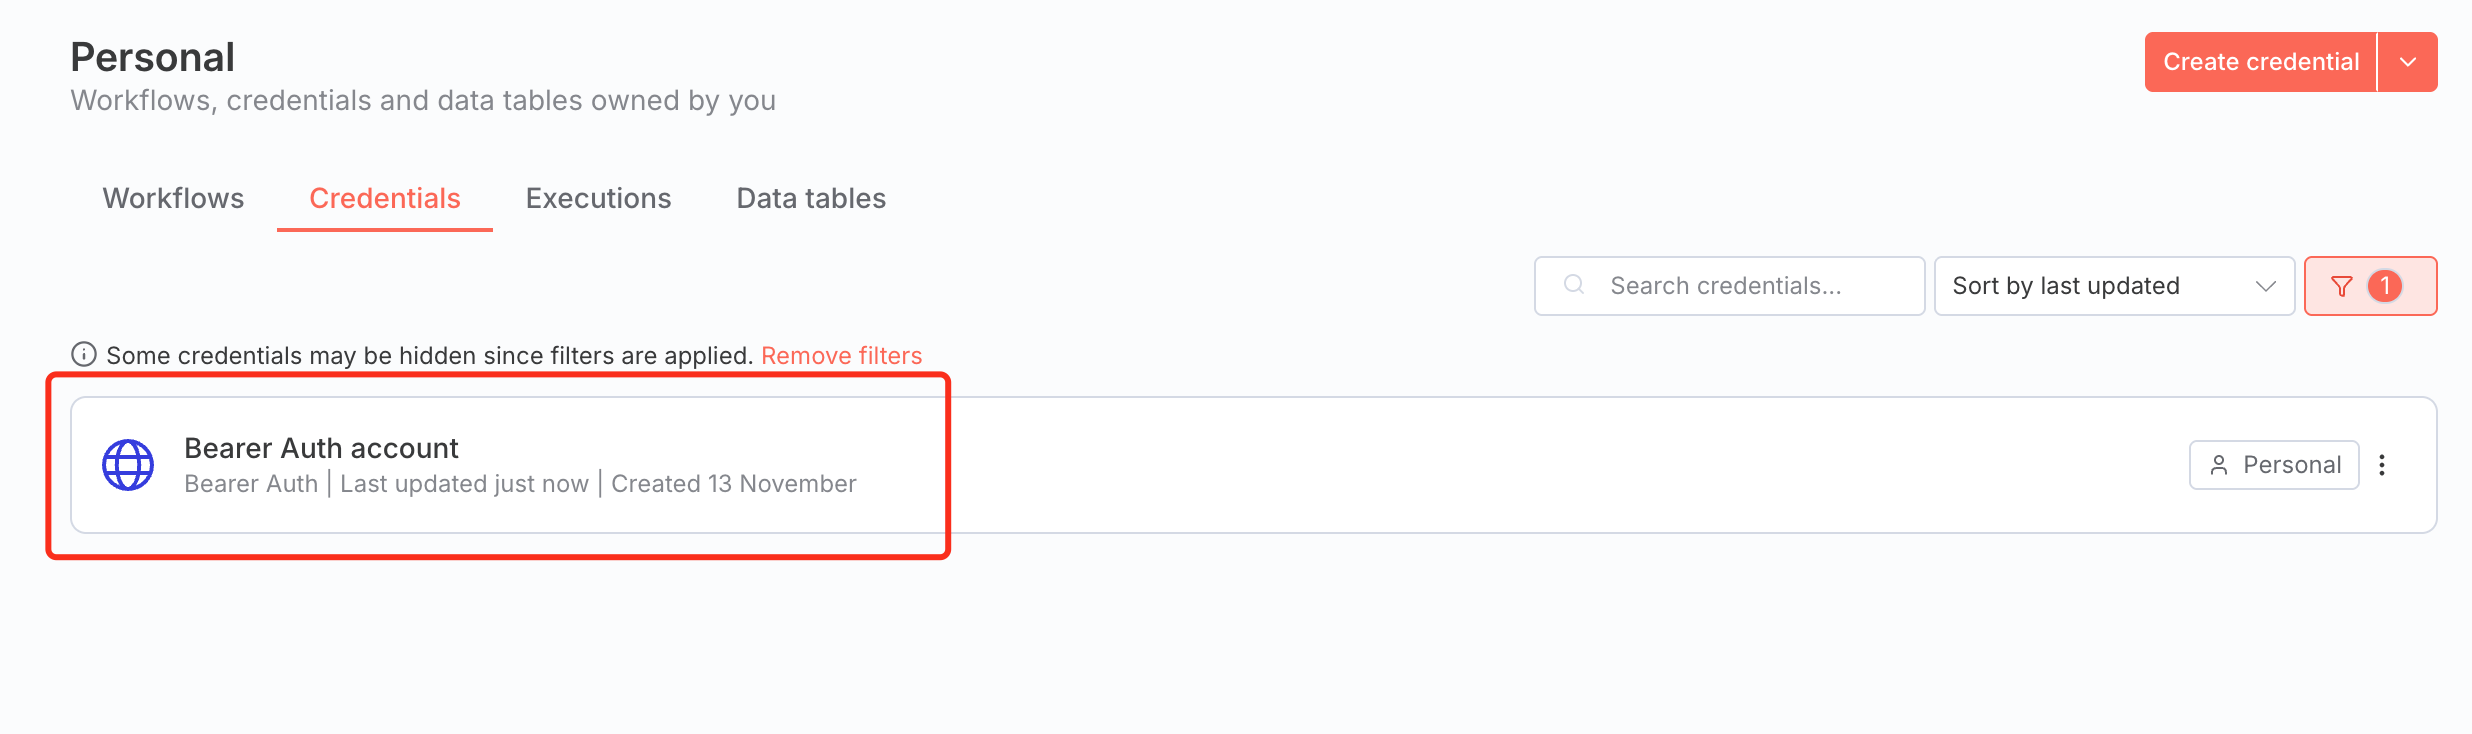
6. Credential Created
Your OpenGuardrails credential is now created and ready to use in your workflows.
Step 2: Choose Integration Method
After creating the credential, you can use either the dedicated OpenGuardrails node (recommended) or the standard HTTP Request node.
Method 1: OpenGuardrails Community Node (Recommended)
Installation
- Go to Settings → Community Nodes in your n8n instance
- Click Install and enter: n8n-nodes-openguardrails
- Click Install and wait for completion
Features
- Check Content: Validate any user-generated content for safety issues
- Input Moderation: Protect AI chatbots from prompt attacks and inappropriate input
- Output Moderation: Ensure AI-generated responses are safe and appropriate
- Conversation Check: Monitor multi-turn conversations with context awareness
Example Workflow: AI Chatbot with Protection
1. Webhook (receive user message)
2. OpenGuardrails - Input Moderation
3. IF (action = pass)
   → YES: Continue to LLM
   → NO: Return safe response
4. OpenAI Chat
5. OpenGuardrails - Output Moderation
6. IF (action = pass)
   → YES: Return to user
   → NO: Return safe response
Detection Options
- Enable Security Check: Detect jailbreaks, prompt injection, role manipulation
- Enable Compliance Check: Check for 18 content safety categories (violence, hate speech, etc.)
- Enable Data Security: Detect privacy violations, commercial secrets, IP infringement
- Action on High Risk: Continue with warning / Stop workflow / Use safe response
Method 2: HTTP Request Node
Use n8n's built-in HTTP Request node to call OpenGuardrails API directly.
Configuration Steps
- Add HTTP Request Node:
- Method: POST
- URL: https://api.openguardrails.com/v1/guardrails
- Authentication: Select your OpenGuardrails credentials
Request Body Example
{
  "model": "OpenGuardrails-Text",
  "messages": [
    {
      "role": "user",
      "content": "{{ $json.userInput }}"
    }
  ],
  "enable_security": true,
  "enable_compliance": true,
  "enable_data_security": true
}
📦 Import Ready-to-Use Workflows
Check the n8n-integrations/http-request-examples/ folder for pre-built workflow templates including basic content check and chatbot with moderation.
Protection Configuration
Configure detection rules, blacklists/whitelists, response templates, etc. to customize your security strategy.
- Risk Type Configuration: Enable or disable specific risk detection categories
- Blacklist/Whitelist: Configure keyword blacklists and whitelists for precise control
- Response Templates: Customize response content for different risk categories
- Sensitivity Threshold: Adjust detection strictness to adapt to different scenarios